Setup DynamoDB for this project
This DynamoDB setup is going to store for the /attendance as well as /list-collection path, make sure you configure carefully for best result
Got it — here’s a Hugo-style, step-by-step guide for creating a DynamoDB table using the AWS Management Console and AWS CLI, with placeholders for screenshots so you can add them later.
Creating a DynamoDB Table
Amazon DynamoDB is a fully managed NoSQL database service that provides fast and predictable performance with seamless scalability. This guide walks you through creating a DynamoDB table from scratch.
1. Sign in to AWS Management Console
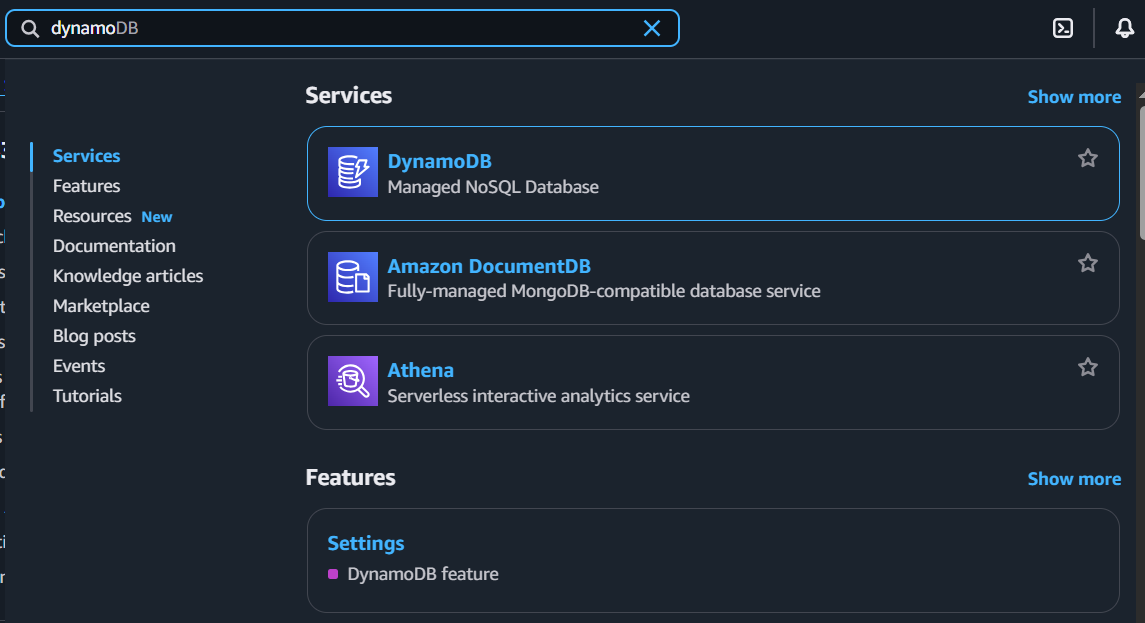
- Open AWS Management Console.
- In the Search bar, type “DynamoDB” and select it.
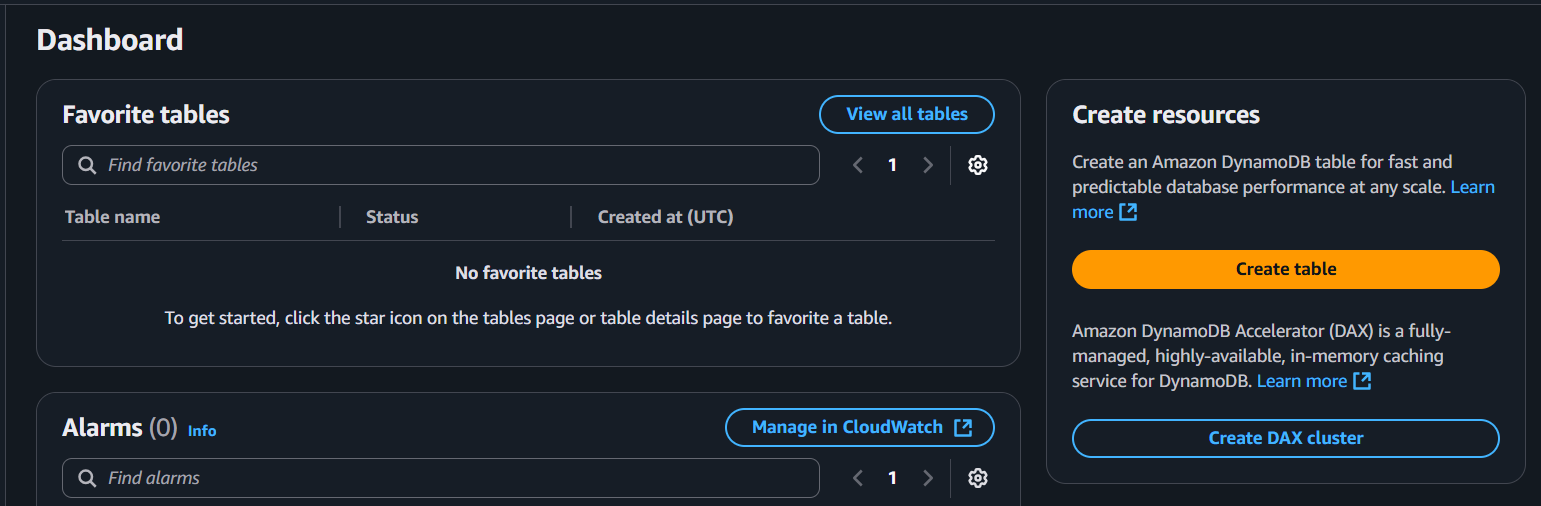
2. Start Table Creation
- Click Create table.
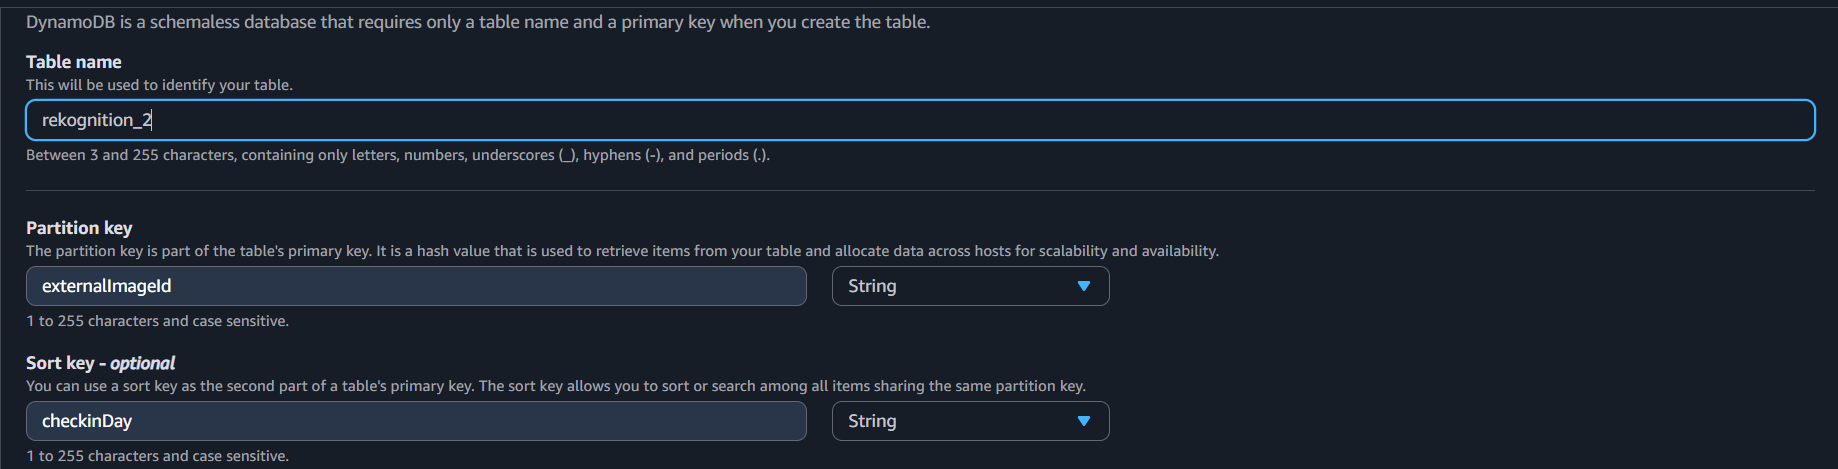
3. Define Table Name and Primary Key
- Table name – Enter a descriptive name for your table (e.g.,
UsersorOrders).

Partition key – Enter a primary key attribute name (For this project is
checkinDay) and select its type (String).Add a Sort key a composite primary key.
4. Configure Table Settings
- Choose Table settings:
- Choose default settings
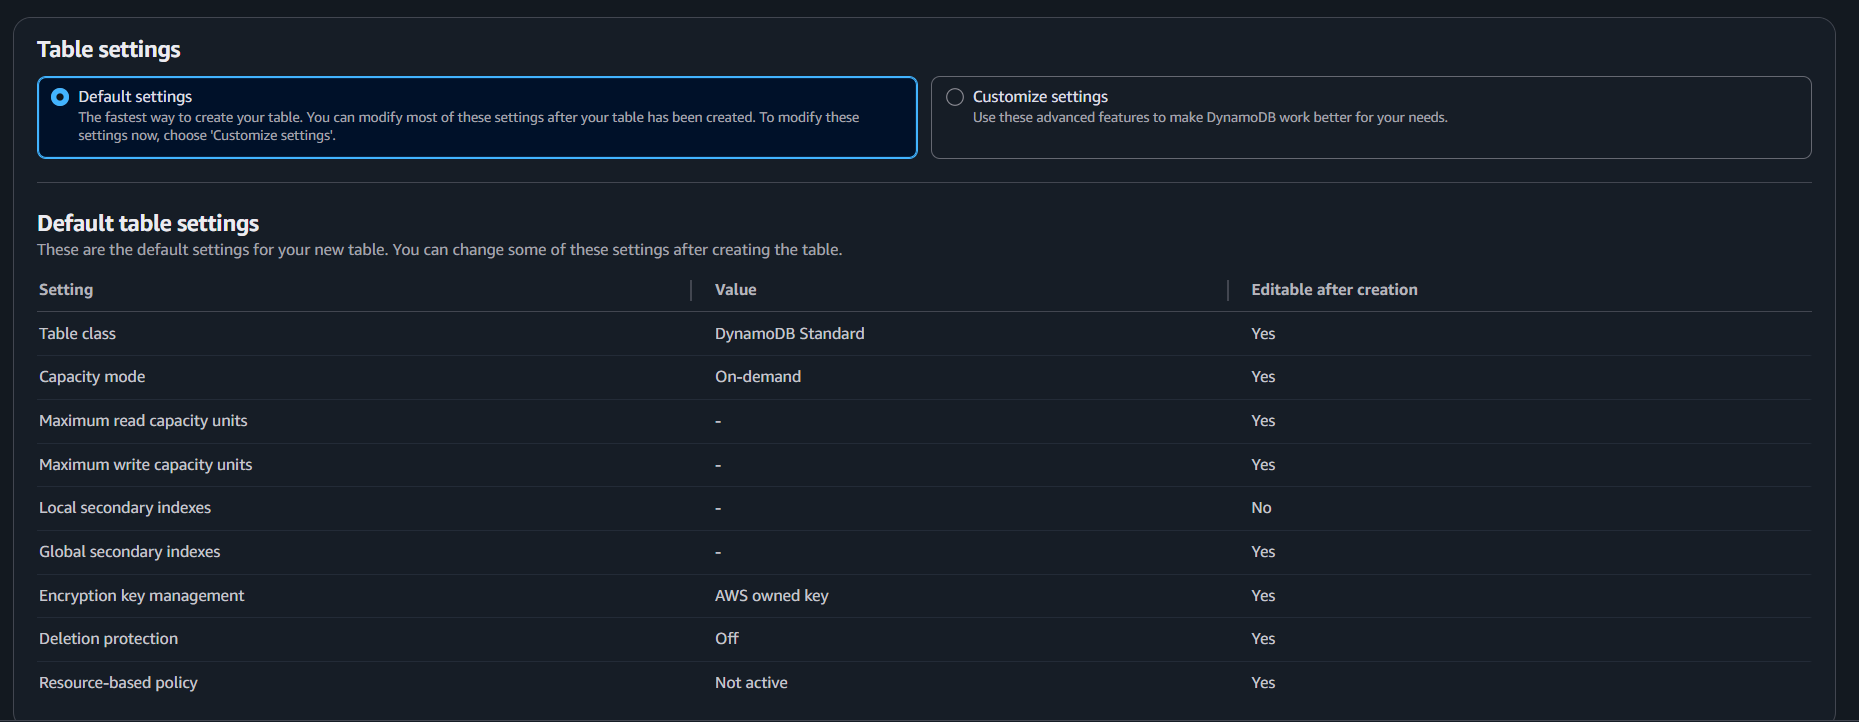
- Set Tags:
- You can set tags if you want to manage your budget and AWS resources.

5. Create the Table
Click Create table.

Wait until the Status changes to
Active.

For detailed pricing and best practices, see the Amazon DynamoDB Documentation.